
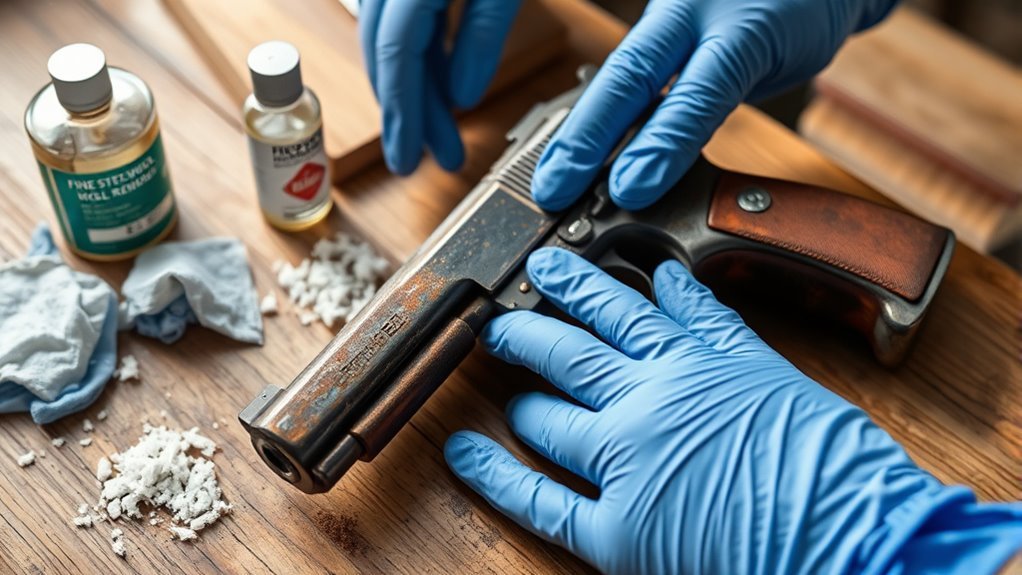
10 Easy Steps to Remove Rust From a Gun
To remove rust from your gun safely and effectively, first make sure it’s completely unloaded.
Then, disassemble the firearm by following the manual carefully. Preparing a clean, well-lit workspace is key, and don’t forget to wear gloves and goggles for protection.
Next, apply a light gun oil to the rusty areas to help loosen the rust. Gently scrub the surface using 0000 steel wool or a soft brush—this helps avoid scratching your gun’s finish. After scrubbing, wipe away any debris, reapply oil, and repeat if necessary.
If you encounter stubborn rust that won’t budge, you can carefully use chemical rust removers. Just be sure to neutralize the chemicals afterward and dry the parts completely.
Finally, protect your gun’s surfaces with oil and store it in a low-humidity environment to keep rust at bay. Stick around to learn more about rust prevention and gun maintenance!
Key Takeaways
- Ensure the firearm is unloaded and work in a well-ventilated, well-lit area using protective gloves and eyewear. Safety first, right?
- Disassemble the gun following the manual and organize parts to access all rusted surfaces safely. It helps to keep everything neat so nothing gets lost.
- Apply light gun oil to rusted areas and let it soak 15–30 minutes to soften rust before gentle abrasion. This softens the rust, making it easier to remove.
- Use 0000-grade steel wool or a soft brass brush with oil to carefully remove rust, avoiding damage to bluing. Be gentle here to keep your gun looking sharp.
- After rust removal, wipe clean with solvent, dry thoroughly, and coat all metal parts with a thin layer of protective oil. This keeps rust from coming back.
What Causes Rust Spots on Firearms
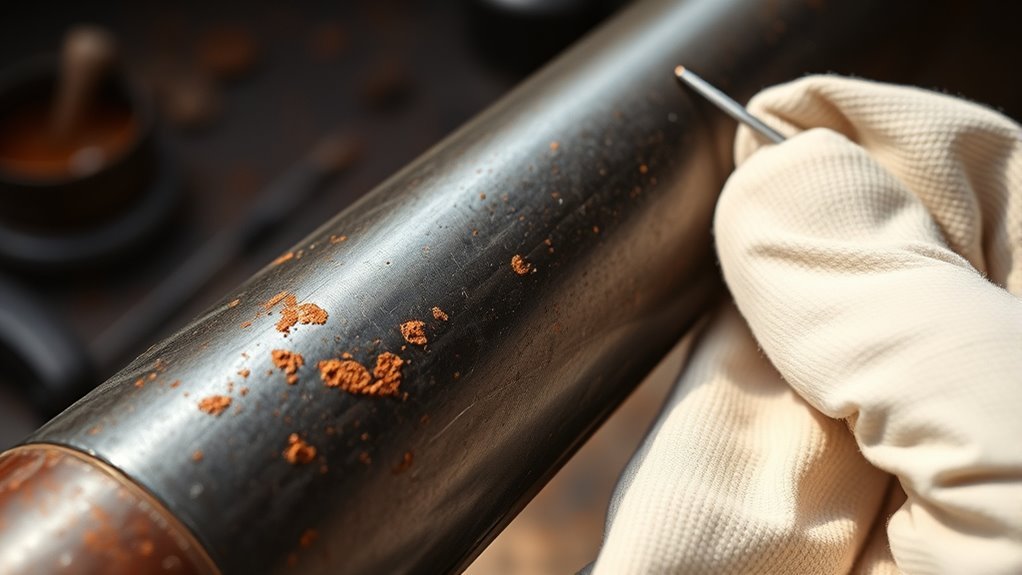
Although firearms are made of steel, they’re vulnerable to rust when iron reacts with oxygen and moisture. This reaction forms iron oxide that flakes and pits the surface.
You’ll often see rust spots on your gun when humidity, sweat, or water come into contact with the metal. Salt, gunpowder residues, and solvents can speed up corrosion by breaking down water’s surface tension and adding electrolytes, making rust form faster.
Poor storage, like keeping your firearm in a humid place or sealed container without desiccants, also increases rust risk. Handling your gun with bare hands transfers skin oils and salts that damage protective oils, causing corrosion at touch points.
Micro scratches and worn bluing provide ideal spots for rust to start. So, to protect your firearm, it’s essential to clean regularly to remove surface rust before it worsens.
How to Disassemble Your Gun for Rust Removal
Rust can spread quickly if not addressed, so removing it thoroughly often requires taking your firearm apart. Before you disassemble, always make certain the gun is unloaded by removing the magazine and checking the chamber both visually and physically.
Thorough rust removal often means disassembling your firearm—always ensure it’s fully unloaded first.
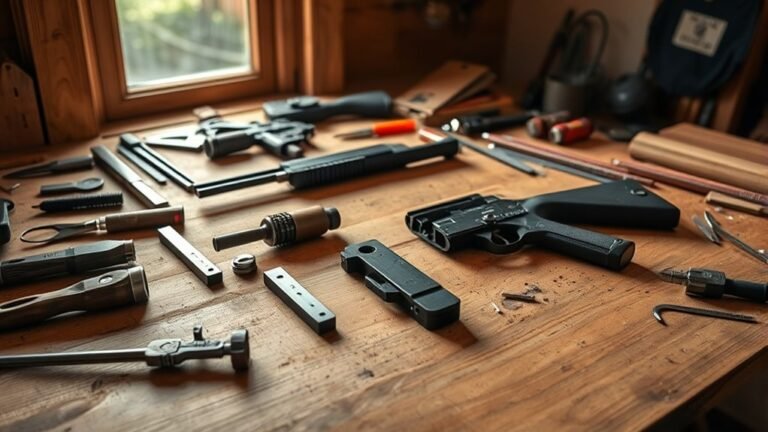
Work in a clean, well-lit area and consult your firearm’s manual or a reliable schematic to know which pins, screws, and levers to remove and in what sequence. Start by removing detachable parts like the stock, sights, and bolt or slide.
Keep small components—pins, springs, screws—in labeled containers or magnetic trays to avoid losing them. It’s a good idea to photograph each step or arrange parts on a cloth to track the order and identify rust-affected areas.
Properly disassembling your firearm is key to fully removing rust from all surfaces and maintaining its function. Taking your time here really pays off.
Essential Tools for Rust Removal

To effectively remove rust from your gun, you’ll need the right cleaning materials like super fine steel wool, light gun oil, and brushes for tight spots. Don’t forget protective gear such as nitrile gloves and eye protection to keep yourself safe.
Setting up a well-ventilated workspace with organized containers will make the process smoother and more efficient. It really helps to have everything in its place before you start. That way, you won’t have to stop midway looking for tools.
Recommended Cleaning Materials
Gathering the right cleaning materials is essential for effectively removing rust from your gun without damaging its finish. Start with 0000 steel wool combined with a light gun oil like CLP or Hoppes #9. This duo gently abrades rust while protecting the bluing.
You’ll also need cotton patches and microfiber cloths to wipe away loosened rust and excess oil between passes. This helps prevent re-deposition and keeps the surface clean.
Finally, use a soft-bristled nylon or brass brush, or an old toothbrush, to work oil into tight spots where steel wool can’t reach.
- 0000 steel wool and light gun oil for gentle rust removal
- Cotton patches and microfiber cloths for cleaning debris
- Soft-bristled brushes for detailed cleaning in crevices
These materials guarantee a thorough, safe rust removal process.
Protective Gear Necessities
Always prioritize your safety when removing rust from a gun by wearing the right protective gear. Wear chemical-resistant nitrile gloves, sized appropriately, to shield your skin from oils, vinegar, and rust particles while keeping your dexterity for handling small parts.
Don’t forget to wear safety goggles or a full-face shield to protect your eyes from splashes of solvents, vinegar baths, or debris when scrubbing with steel wool or brushes. Keep a first-aid kit and eyewash station nearby in case of accidents.
Additionally, work in a well-ventilated area or use a fume extractor to avoid inhaling harmful vapors from rust removers. These precautions guarantee your rust removal process is both effective and safe.
Optimal Workspace Setup
Since rust removal requires precision and care, setting up an ideal workspace is essential for both efficiency and safety. As a hobby gunsmith, your workspace should be well-lit and ventilated, with a sturdy bench covered by a protective mat or towel.
Organizing your tools and parts helps streamline the gun cleaning process. Focus on these three essentials:
- Organized Layout: Arrange disassembled parts on labeled or magnetic trays. Keep small pins in sealed bags to avoid loss.
- Essential Tools: Have 0000 steel wool, soft-bristle brushes, commercial gun-cleaning pads, and light gun oil within reach.
- Safety & Cleaning Supplies: Use chemical-resistant gloves and eye protection. Keep distilled white vinegar or rust remover handy, plus disposable rags for wiping.
This setup makes certain you work efficiently and safely during rust removal. It really helps keep things smooth and hassle-free.
Preparing Your Workspace and Staying Safe
Before you begin removing rust from your gun, set up a well-ventilated, well-lit workspace that’s free of ammunition. Make sure you have a sturdy, non-slip surface covered by an absorbent mat or cardboard to catch oil and debris.
Always wear chemical-resistant gloves and eye protection when handling oils, solvents, or vinegar to protect your skin and eyes. It’s better to be safe than sorry.
Keep a first-aid kit and fire extinguisher nearby just in case of emergencies. Organize small parts in labeled containers or zip bags. Using a magnetic tray is a great way to avoid losing them during disassembly.
Have rags, paper towels, gunsmithing tools, and steel wool within reach. Remember to discard used steel wool in a metal container to prevent fire hazards.
Try to control humidity below 50%, and keep distilled water and soap ready for rinsing after acid treatments. Staying safe and organized will make your rust removal process much more efficient.
Apply Oil and Lubricants to Loosen Rust
You’ll want to use the right oil to safely loosen rust without damaging your gun’s finish. Light gun oils like CLP, Hoppe’s No. 9, or Kroil penetrate corrosion and protect metal surfaces.
Choosing proper lubricants helps you break down rust efficiently while preserving your firearm. It’s all about using the right products to get the job done without any harm.
Benefits of Using Oil
Often, applying light gun oil is the most effective way to loosen rust on your firearm. Light gun oil seeps into rusted areas, softening corrosion and suspending iron oxide for easier rust removal.
When you use it, you benefit from a few key things.
- Penetration: The oil reaches deep into rusted crevices, breaking down stubborn corrosion.
- Lubrication: It allows gentle abrasion with steel wool or brushes, minimizing scratching.
- Protection: After cleaning, a fresh oil coat prevents new rust from forming.
It’s a simple step that really makes a difference!
Choosing Proper Lubricants
Selecting the right lubricant is essential when tackling rust on your firearm. Use a light penetrating gun oil like Kroil, CLP, or Hoppes #9, applying it liberally to rusted spots.
Let it soak for 15–30 minutes—or longer for heavy rust—to penetrate pits and loosen corrosion.
After soaking, gently scrub with 0000-grade fine steel wool or a soft brass brush. This provides controlled abrasion without harming bluing or scratching metal.
Avoid harsh solvents or acids that can damage finishes. But if you must use chemical removers, make sure to neutralize and rinse thoroughly.
Then, apply light oil immediately to prevent flash rust. Once rust is removed, wipe the area clean and coat it with a thin layer of protective oil or grease.
This will help inhibit future oxidation and keep your firearm in top condition.
Remove Rust With Fine Steel Wool or Copper Pads
Gently rub surface rust away using 0000-grade steel wool soaked in gun oil like Kroil or Hoppes #9, always working along the grain to preserve the bluing. You can also use copper pads, which are gentler on finishes and less likely to embed iron particles.
Just remember these key steps: Use light pressure and keep the abrasive moving to avoid removing blue or causing wear spots. And don’t forget to frequently check your progress to prevent over-scrubbing.
After you’ve removed the rust, wipe the area clean with solvent, dry it thoroughly, and then apply a thin coat of gun oil to protect the metal.
One more thing—avoid using steel wool on bores or precision parts. And if the rust is severe or you see pitting, it’s best to stop and get a gunsmith’s help.
When to Use Chemical Rust Removers
You should reach for chemical rust removers only when rust is heavy or deeply pitted and simple methods won’t cut it.
Keep in mind these products can harm your gun’s finish, so test carefully and follow safety instructions.
Understanding the risks and benefits helps you decide when chemicals are the right choice.
Appropriate Rust Severity
Understanding the appropriate rust severity is essential before reaching for chemical rust removers. You should avoid using harsh chemicals on minor rust or light rust issues, as these can damage factory bluing or cause discoloration.
Instead, reserve chemical removers for more stubborn rust. Here’s when to use them:
- Moderate to heavy surface oxidation that doesn’t respond to oiling or gentle scrubbing.
- Severe pitting or scale buildup where mechanical methods are impractical.
- After fully disassembling and isolating parts to prevent damage to other components.
If you’re unsure about the rust severity or the gun’s value, it’s best to consult a gunsmith. This prevents irreversible damage from improper chemical use and guarantees your firearm remains in good condition.
Chemical Risks and Benefits
When chemical rust removers come into play, it’s usually because mechanical methods can’t handle the severity of the corrosion. These products, like naval jelly or phosphoric-based solutions, dissolve rust quickly but will remove the bluing and damage heat-treated finishes. Use them only on unblued or sacrificial parts.
Mild rust converters can stop active corrosion without aggressive abrasion by turning rust into stable black iron phosphate. Strong acids work fast but require gloves, eye protection, ventilation, and thorough rinsing to avoid skin damage and ongoing corrosion.
Always test chemicals on a hidden spot first, follow instructions carefully, and avoid soaking blued components to prevent irreversible finish loss. Expect to re-blue or refinish parts after using chemical rust removers to restore protection.
How to Apply Chemical Rust Removers Safely
Although chemical rust removers can effectively restore your gun’s metal surfaces, you must handle them with care to avoid damaging the finish or harming yourself. First, always read and follow the manufacturer’s instructions for the chemical rust remover, including recommended contact time and dilution.
Second, wear chemical-resistant gloves and eye protection, work in a well-ventilated area, and avoid inhaling fumes. It’s important to protect yourself while working with these chemicals.
Third, test the remover on a small, hidden spot to make certain it won’t strip bluing or markings excessively. This little step can save you a lot of trouble later.
Apply the remover with a brush or cloth, keeping contact times short as directed. After treatment, immediately neutralize the chemical to stop its action and prevent damage.
Finally, dry the parts thoroughly to prepare for further cleaning or protection. Taking these careful steps will help keep your gun looking great and safe to handle.
Cleaning and Neutralizing After Rust Removal
Rinsing your gun parts immediately after rust removal is essential to neutralize any remaining acids and wash away dissolved iron salts. You should rinse parts thoroughly with warm distilled water and mild detergent, then rinse again with distilled water.
Next, dry parts completely using compressed air or a clean, lint-free cloth. Follow this by a short bake under 150°F or placing the parts in direct sunlight to eliminate moisture.
Finally, apply a thin, even coat of light gun oil or corrosion-inhibiting wax. Make sure to work it into seams, screw holes, and barrel bores using patches or cotton swabs.
Reinspect the parts within 24–72 hours for any flash rust and reapply oil if needed.
| Step | Action | Purpose |
|---|---|---|
| Rinse | Thorough with warm distilled water | Neutralize acids, remove salts |
| Dry | Air or cloth, then low heat | Remove moisture |
| Apply Oil/Wax | Thin, even coat | Protect metal |
| Inspect | Check for flash rust | Crucial lasting protection |
How to Prevent Rust and Keep Your Gun in Top Shape
Regular maintenance plays a crucial role in preventing rust and keeping your gun in top condition. To avoid rust spots and preserve your firearm, follow these steps:
After each use, clean your gun thoroughly with solvent, dry it, and apply a thin coat of gun oil. This helps shield it against moisture and salt residues.
Clean your gun after every use with solvent, dry it, and apply oil to protect against moisture and salt.
Store your gun unloaded in a climate-controlled environment with humidity below 40%. You can use desiccants or a dehumidifier in your safe to prevent condensation.
Wipe down metal parts with an oiled cloth after handling. This removes skin oils that speed up oxidation. Also, inspect your firearm monthly and address any discoloration immediately.
If you haven’t already, log in or register with local firearm maintenance forums. They’re great for extra tips and support on keeping your gun rust-free.
Frequently Asked Questions
How to Get the Rust off of a Gun?
You’ll first soak the rusted areas with light gun oil, then gently scrub using fine steel wool to remove corrosion. Repeat if needed.
Make sure to clean thoroughly, dry completely, and apply protective oil to prevent future rust. This way, your gun stays in good shape and ready to use.
Will WD-40 Remove Rust From a Gun?
Yes, WD-40 can remove light surface rust by loosening it for easy wiping or gentle scrubbing.
But you’ll need proper gun oil afterward for long-term protection, especially with heavier rust or delicate finishes.
What Removes Rust Immediately?
Want rust gone immediately? Use distilled white vinegar or commercial rust removers—they chemically dissolve rust fast.
Just soak, watch the bubbling, then rinse and dry thoroughly. You’ll see results quicker than you expect!
What Is the Best Product to Remove Rust From a Gun?
You’ll want to use quality gun oil like CLP or Hoppes #9 combined with super-fine 0000 steel wool for light rust. It’s gentle enough to clean without harming your firearm’s finish.
If the rust is heavier, you might want to consider naval jelly. Or better yet, take it to a professional gunsmith. That way, you avoid any risk of damage while getting the rust removed properly.
Conclusion
Removing rust from your gun might seem intimidating, but with the right steps, it’s easier than you think. You might worry that using chemicals could damage your firearm, but when applied carefully and followed by proper cleaning, they’re safe and effective.
By staying patient and consistent, you’ll restore your gun’s condition and prevent future rust. Taking these simple precautions keeps your firearm reliable and ready whenever you need it.
Rust removal from guns doesn’t have to be complicated. Following these easy steps not only protects your investment but also ensures your firearm functions smoothly. With the right approach, you can maintain your gun’s appearance and performance for years to come. So, don’t let rust slow you down—keep your gun clean, rust-free, and ready for action!


One Comment