How to Move a Gun Safe in 7 Easy Steps
To move your gun safe in 7 easy steps, start by planning your route carefully and measuring the safe’s size and weight. Knowing these details helps you avoid surprises along the way.
Next, gather the right tools like a heavy-duty dolly, strong straps, and essential safety gear to keep everything secure.
Empty the safe completely before moving it. This makes the safe lighter and prevents anything inside from shifting or breaking.
Then, protect the safe with padding and secure it tightly so it stays safe during the move.
Carefully load the safe onto the dolly, making sure it’s balanced.
Move it slowly and steadily to avoid any accidents or damage.
Finally, once you reach the destination, anchor the safe properly on a level surface.
Follow these basics, and you’ll handle your safe move with confidence and care.
Key Takeaways
– Measure the safe’s dimensions and weight, then plan a clear, obstacle-free route for moving.
This way, you know exactly what you’re dealing with and can avoid any surprises along the way.
– Empty the safe completely, including firearms and ammunition, and inspect all compartments.
It’s important to start with an empty safe so it’s lighter and safer to handle.
– Secure the safe with heavy-duty straps on a rated dolly, using moving blankets to prevent damage.
These precautions help keep your safe protected and stable during the move.
– Move the safe slowly with steady, controlled force, coordinating with helpers to avoid tipping or shifting.
Taking it slow and working together keeps everyone safe and the safe intact.
– Place the safe on a level surface and anchor it securely following manufacturer guidelines for stability and safety.
This final step ensures your safe stays put and functions properly in its new spot.
Plan Your Gun Safe Move: Size, Weight & Route

Before you move your gun safe, measure its dimensions and weight accurately to figure out the right equipment and how many helpers you’ll need. Check the safe’s model number or documentation to find the exact size and weight specs.
Measure your gun safe’s size and weight first to choose the right gear and helpers for a smooth move.
This info really helps you plan ahead and avoid any surprises during the move. Next, you’ll want to plan your route carefully.
Try to avoid tight corners, narrow doorways, or stairs that could make moving tricky. Also, identify and clear any obstacles along the way to keep things smooth.
Pick a route that has minimal incline and solid pavement to prevent slipping or tipping. Taking these steps before moving your gun safe makes the whole process safer and way more efficient.
Plus, it saves you time and lowers the risk of damage to your safe or property.
Gather Tools, Dollies, Straps & Safety Gear
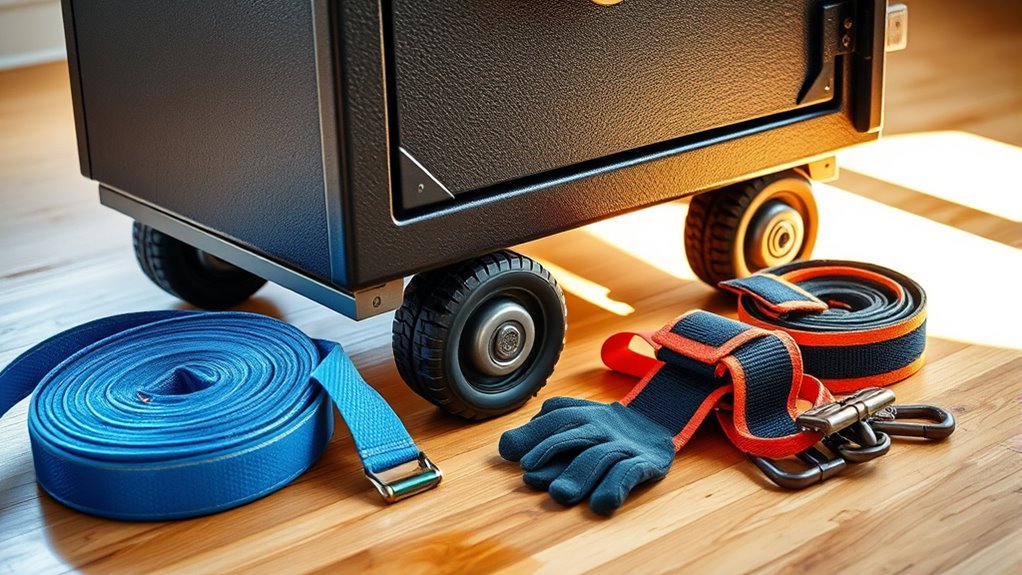
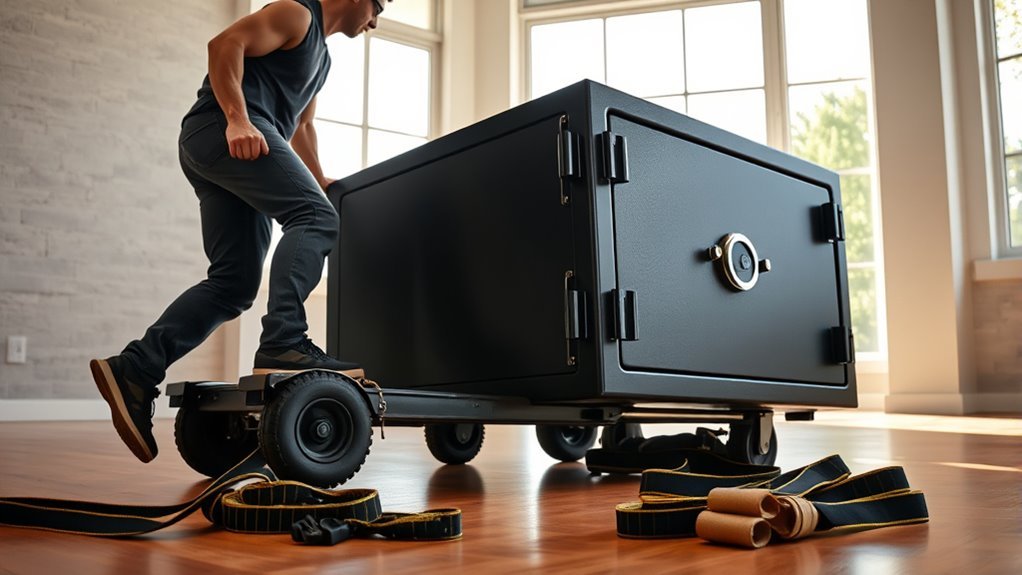
When moving your gun safe, you’ll need the right tools to keep the process safe and efficient. Start with a sturdy, heavy-duty dolly rated for at least your safe’s weight—usually over 1,000 pounds—to guarantee it can handle the load.
Secure the safe tightly with high-quality ratchet or moving straps to prevent any shifting during transport. Wearing safety gear like steel-toe boots, gloves, and a back brace is a smart move to protect yourself and keep proper lifting form.
Use moving blankets or foam padding around the safe to avoid scratches and damage. It’s also a good idea to keep extra tools handy, like shims, leveling blocks, or lifting straps, to help manage uneven surfaces and control the lift.
Having these essentials ready will make your move smoother and safer. It’s all about being prepared and taking your time.
Empty Your Gun Safe Before Moving

Since moving a gun safe involves heavy lifting and careful handling, you should empty it completely beforehand to prevent damage or accidents. Start by removing all firearms, making sure they’re unloaded and stored securely in a separate location following proper safety protocols.
Take out any ammunition and other contents as well. Be thorough—inspect every compartment and shelf to confirm the safe is entirely empty.
Removing loose items reduces weight and prevents shifting during transit, which could damage the safe or its contents. Handling firearms with care during this process is essential to avoid accidental discharges.
Protect Your Gun Safe With Padding & Secure It
Before you move your gun safe, wrap it completely in thick moving blankets or foam padding to protect it from scratches and dents. Secure the padding tightly with straps or strong tape to keep everything in place during transport.
Make sure to add extra padding around corners. Also, use straps to stabilize the safe on your moving equipment for a safer move.
Taking these steps really helps keep your safe in great shape while you’re moving it. It’s all about protecting your investment and making the move smoother.
Use Quality Padding
Many movers rely on thick moving blankets or specialized padding to protect a gun safe from shocks and scratches during transport. You should choose quality padding, like high-density foam or quilted blankets, especially for delicate or antique safes.
Wrap the padding tightly around your safe to absorb impacts and prevent surface damage. Proper padding is essential when guiding stairs, tight spaces, or uneven surfaces. It really helps reduce the risk of dents and chips.
Make sure the padding stays secure throughout the move to avoid shifting that could expose vulnerable spots. Combining this padding with careful handling ensures your gun safe remains in top condition during transport.
Using the right padding is a simple yet effective step to safeguard your valuable safe from damage. It’s definitely worth the extra effort!
Secure With Straps
Once you’ve wrapped your gun safe securely with padding, the next step is to fasten it tightly using heavy-duty straps. These straps are essential for safe moving, especially with heavy safes. They prevent shifting and damage during transport.
Make sure the straps are snug but not so tight that they warp or scratch the safe’s surface. Attach them to secure points on your dolly or moving equipment, avoiding delicate parts.
To secure with straps effectively:
- Use heavy-duty straps designed for heavy loads.
- Check and tighten straps regularly during the move.
- Avoid strapping over exposed or sensitive areas.
Following these steps will keep your gun safe stable and protected throughout the move. It’s all about keeping things safe and steady!
Load Your Gun Safe Safely Onto a Dolly
Before loading your gun safe onto the dolly, make sure it’s securely positioned and balanced to prevent tipping. Use strong straps to fasten the safe tightly, keeping it stable during the move.
Taking these steps will help you maintain control and protect both the safe and yourself. It’s all about being careful and prepared before you start moving.
Secure Safe Positioning
How do you guarantee your gun safe stays secure while loading it onto a dolly? The key is secure safe positioning.
First, make sure the safe is completely empty to reduce weight and avoid shifting contents. Use a sturdy dolly sized to support your safe’s weight and dimensions. Center the dolly carefully underneath the safe to balance it evenly. This prevents tipping or sudden shifts when you move.
Keep these points in mind for secure safe positioning:
- Remove all contents before loading
- Choose a dolly rated for the safe’s weight
- Position the dolly squarely under the safe’s center of gravity
Use Proper Straps
Although securing your gun safe on a dolly might seem straightforward, using proper straps is essential to keep it stable and prevent accidents. Choose heavy-duty ratchet straps rated for at least 1.5 times your safe’s weight to guarantee enough support.
Attach the straps to reinforced points on the safe, avoiding hinges or weak spots that might fail under tension. Cross the straps underneath the safe in an “X” pattern to distribute the load evenly and boost stability.
Make sure the straps have a secure locking mechanism to prevent slipping or loosening during movement. And don’t forget to check and tighten the straps regularly as you move to keep the safe firmly in place. This way, you reduce the risk of shifting or tipping on the dolly.
Balance Weight Carefully
Once you’ve secured your gun safe with strong straps, the next step is to load it carefully onto the dolly. Proper balance is essential to prevent tipping or shifting during transport.
Make sure the safe is perfectly centered on the dolly to evenly distribute its weight. Use a dolly rated to handle the entire weight, especially for safes over 1,000 pounds.
Lift or slide the safe with several helpers to maintain balance and avoid uneven stress on the safe or dolly. Keep the load low and stable for better control.
Remember these key points:
- Center the safe on the dolly for even weight distribution
- Use a sturdy dolly rated for your safe’s weight
- Secure the safe firmly with straps to prevent shifting
This careful balance will make moving safer and smoother.
Transport Your Gun Safe Slowly and Steadily
When you transport your gun safe, moving it slowly and steadily helps prevent shifting or tipping that could cause damage. Moving a gun safe requires a controlled pace, so avoid sudden stops or quick turns that might destabilize the safe or harm your moving equipment.
Apply steady, even pressure when pushing or pulling to keep the safe balanced and under control. Keep clear communication with your helpers to coordinate each step smoothly, preventing jerky or unexpected movements.
Throughout the move, regularly check that the safe remains firmly positioned on the dolly or other moving tools. By following these careful steps, you’ll guarantee a safe and successful transport without risking damage to your gun safe or surrounding property.
Set Up and Anchor Your Gun Safe Safely
Before anchoring your gun safe, make sure you place it on a level, solid surface. This helps prevent any shifting or tilting during installation. It’s a critical step for the safe’s stability and overall security.
Use heavy-duty bolts that match your floor or wall material, whether that’s concrete, wood, or steel. This will help you securely anchor the safe. And don’t forget to follow the manufacturer’s guidelines closely to protect both the safe’s structure and your warranty.
Keep these tips in mind for a secure installation:
- Use a drill and appropriate anchors for maximum stability
- Anchor the safe at recommended points to maintain security
- Regularly inspect anchors to ensure ongoing stability
Frequently Asked Questions
What Is the Easiest Way to Move a Gun Safe?
The easiest way to move a gun safe is to empty it, use a sturdy dolly with straps, enlist helpers, and move slowly on flat surfaces.
This keeps you safe and prevents damage during the move. It might sound like a lot, but taking these steps really makes the process smoother. Just take it one step at a time!
What Kind of Dolly to Move a Gun Safe?
You’ll want a heavy-duty appliance or furniture dolly rated for your safe’s weight, ideally with thick, wide tires or pneumatic wheels.
Make sure it has a low profile and secure the safe firmly before moving. That way, you’ll have better control and reduce the risk of accidents.
Do Two Men and a Truck Move Gun Safes?
You won’t believe it, but yes, two men and a truck can move gun safes—if the safe’s light and you’ve got the right gear.
Otherwise, you’ll need pros to avoid injury and disaster. It’s not something to take lightly!
What Is the Best Tool for Moving a Safe?
The best tool for moving a safe is a heavy-duty dolly or hand truck designed for heavy loads. You’ll want straps to secure the safe and keep it from shifting during the move.
If stairs are involved, a stair-climbing dolly makes the job easier and safer. It’s definitely worth considering to avoid any accidents or damage.
Conclusion
Moving your gun safe might seem intimidating, but with the right plan and tools, you can handle it safely and efficiently. Don’t rush—taking your time protects both you and your valuable safe.
Remember, emptying and securing it properly makes the process smoother. So, why risk injury or damage when you can follow these simple steps?
Stay careful, move smart, and your gun safe will be secure in its new spot in no time. By following these easy steps for moving a gun safe, you’ll keep yourself safe and avoid damage to your property. A well-planned move ensures your gun safe stays intact and ready to protect your valuables wherever you place it next.