How to Make Paper Guns in 10 Easy Steps
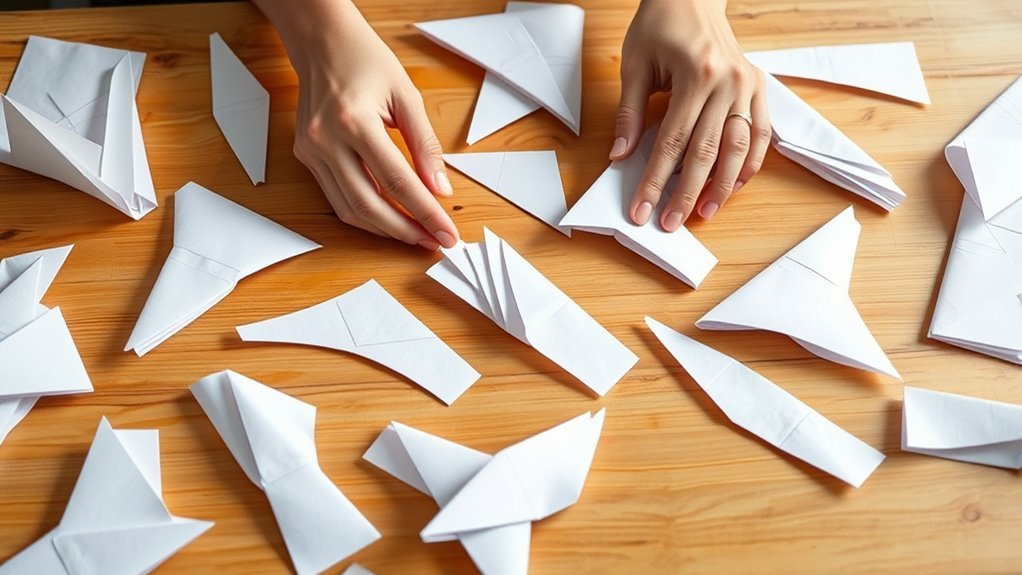
Start by choosing sturdy, low-gloss paper—this helps your paper gun hold its shape better. Fold it in half lengthwise to create a strong base that will support all the other folds.
Next, fold the top corners inward to shape the barrel. Then, fold the top edge down to create the muzzle, which gives your gun a realistic look.
After that, fold the sides inward to form the body of the gun.
Fold up the bottom to shape the handle, making it comfortable to hold.
Make sure to secure all folds firmly and reinforce the key creases so your paper gun stays together.
You can even add some details to make it look real and cool.
Finally, test how it works and make any adjustments you need to perfect your design.
Keep exploring to find advanced tips and custom touches that can take your paper guns to the next level!
Key Takeaways
- Choose sturdy, smooth paper like cardstock or construction paper for durability and clean folds.
- Fold top corners inward to form the barrel and create sharp, symmetrical creases.
- Shape the gun’s body by folding sides inward and fold the bottom upward to form the handle.
- Reinforce all critical folds with multiple creases or tape for stability and smooth edges.
- Customize with markers, small paper details, and test the firing action to ensure functionality.
Give these steps a try, and you’ll have a cool paper gun in no time!
Choose the Best Paper for Your Paper Gun

How do you pick the right paper for your paper gun? There are a few things you need to know to choose the best option. First, opt for sturdy, low-gloss paper like cardstock or construction paper to keep your gun durable and well-shaped.
If you want intricate folds, thinner paper such as printer or origami paper works well, but be careful—it tears more easily. Make sure the paper has a smooth surface; this helps you fold cleanly and get precise creases, which leads to a more accurate paper gun.
Avoid overly thick or textured paper because it’s harder to fold and can ruin the gun’s functionality. Finally, pick colors or patterns that suit your style or stick with plain paper for a classic look.
Fold the Paper in Half Lengthwise to Start Your Paper Gun
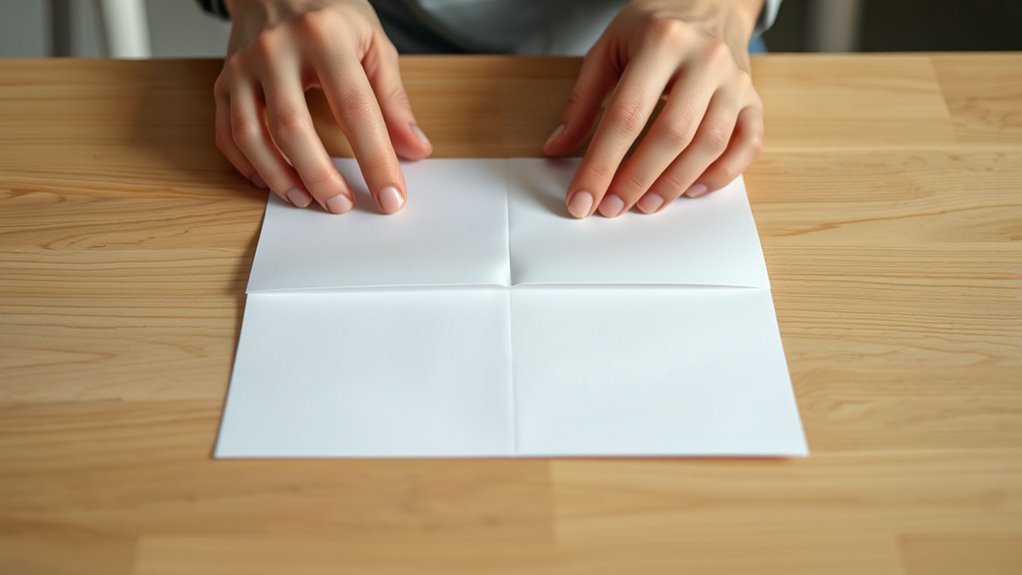
Start by choosing the right paper size to guarantee your gun feels sturdy and balanced. Carefully align the long edges before folding to create a clean, precise crease.
Press firmly along the fold to make it sharp. This sets a solid foundation for the rest of your paper gun. Easy, right?
Choosing Paper Size
One essential step in making your paper gun is folding the paper in half lengthwise to create a strong central crease. To get started, choose a standard sheet of letter or A4 paper—this size ensures your paper gun will be well-proportioned and manageable.
The length of this folded paper sets the scale of your finished model, so pick a size that suits how big or small you want your gun to be. When folding, make sure the edges align neatly before pressing down to get a clean crease.
Use a ruler or your fingernail to firmly crease the fold; this helps keep the paper layers tight and makes the next folds easier. Selecting the right paper size at this stage sets a solid foundation for your paper gun.
Aligning Edges Precisely
After choosing the right paper size and folding it in half lengthwise, the next step is to align the edges precisely. Carefully bring the two long edges together, making sure they match perfectly without any gaps or overlaps.
Keep your fingers steady to prevent the paper from shifting as you go. Once aligned, press down firmly along the fold with your fingernail or a flat tool to create a crisp edge.
Before moving on, unfold the paper slightly to double-check that the crease is straight and even from one end to the other. This precise alignment prevents crooked folds later and guarantees your paper gun will have clean, sharp lines for better structure and performance in the following steps.
Creating a Sharp Fold
Although it might seem simple, folding the paper in half lengthwise with perfectly aligned edges is vital for a sharp central crease that guides the entire construction. First, carefully align the edges so they match up exactly.
Then, fold the paper and press firmly along the fold using your fingernail or a bone folder. This pressure creates a clean, crisp line that will make your subsequent folds more accurate.
After pressing, unfold the paper to reveal the central crease, which serves as an essential guide for the next steps. Taking the time to create this sharp fold ensures your paper gun will be symmetrical and neat.
This sets a solid foundation for the entire process. Don’t rush—precision here makes all the difference.
Shape the Barrel by Folding the Top Corners

When you fold the top left and right corners inward toward the center crease, you’ll start shaping the barrel’s front end. Make sure both corners align neatly with the center line to form a symmetrical, pointed tip.
Take your time and create precise creases; this keeps the barrel firm and maintains the paper gun’s overall shape. To get sharp, clean folds, use a ruler or any straight edge as a guide.
After folding, flatten the creases thoroughly by pressing down firmly—this will prevent the folds from unfolding later. These careful steps not only enhance the paper gun’s appearance but also make it sturdier for the next folding stages.
Stay focused on accuracy here; it sets the foundation for a well-crafted barrel.
Create the Paper Gun’s Muzzle With a Downward Fold
Now, focus on folding the top edge downward at a sharp 45-degree angle to form the muzzle. Make sure your crease is precise to create a clean, cone-shaped tip that looks just right.
Use your fingernail or a ruler to press firmly and keep the fold crisp and secure. This will help your paper gun look neat and ready to go!
Folding Techniques Overview
Start by folding the top corners of your paper toward the center crease to form a sharp, pointed tip. Make sure this fold is crisp, as it sets the foundation for a clean muzzle shape that resembles the front of a gun.
Next, fold the newly formed top edges downward along the center crease, aligning them evenly for symmetry. Press down firmly on this downward fold to flatten it completely, creating a sturdy extension for the muzzle.
Repeat these steps carefully to keep both sides even and proportional to the rest of the paper gun. Mastering this folding technique is key to giving your paper gun a defined, realistic muzzle that enhances the overall look without adding bulk or unevenness.
Muzzle Shape Precision
Although the previous folds set the foundation, you’ll want to create the paper gun’s muzzle with a precise downward fold at the front end. Start by folding the paper downward to form a small, neat triangle.
Make sure the fold is sharp and symmetrical to give your gun a clean, uniform look. Press down firmly with your fingers or use a ruler to reinforce the crease, ensuring accuracy.
Adjust the fold size based on the muzzle width you want—typically a small triangle or rectangle works best. Finally, smooth out the fold and trim any excess paper to sharpen the muzzle’s edges.
This attention to detail will give your paper gun a well-defined, professional appearance right at the front.
Fold the Sides to Form the Paper Gun’s Body
Fold each side of the paper inward along the edges to shape the gun’s body, making certain the folds are crisp and even. Align the edges evenly to keep the gun symmetrical and avoid a lopsided look.
Use your fingers or a ruler to press firmly on the folds to secure sharp creases. Fold both sides toward the center in a mirror image for balanced construction.
Repeat this on both sides until the paper forms a neat rectangular shape resembling the gun’s body.
| Step | Action | Tip |
|---|---|---|
| 1 | Fold left side inward | Align edges precisely |
| 2 | Fold right side inward | Mirror the left fold |
| 3 | Press folds firmly | Use ruler/fingers |
| 4 | Check symmetry | Adjust if needed |
| 5 | Repeat until body forms | Ensure sharp creases |
Make the Handle by Folding the Bottom Section
Once you’ve shaped the gun’s body with neat, even folds, you’ll want to create the handle by folding the bottom section upward. This step is essential for giving your paper gun a sturdy grip.
Start by aligning the edges carefully, making sure the fold is tight and crisp. A well-executed crease will provide stability and guarantee the handle feels solid in your hand.
To perfect the handle:
- Fold the bottom section upward firmly, aligning edges for a clean finish.
- Reinforce the fold by folding the bottom section multiple times if you need extra strength.
- Smooth out the handle with your fingers or a tool to make it even and comfortable to hold.
This careful folding shapes a durable handle ready for the next step. Easy, right? Just take your time, and you’ll have a solid grip in no time.
Secure and Reinforce Folds to Keep Your Paper Gun Sturdy
To keep your paper gun sturdy, you’ll want to secure and reinforce every fold carefully. Use a bone folder or the edge of a credit card to press firmly along all folded edges, creating crisp, secure creases.
Apply a small amount of glue or double-sided tape along the fold lines before pressing them down to strengthen the folds. Make multiple passes with your fingernail or tool to ensure folds are tightly pressed and less likely to unfold.
For extra strength, fold the paper in the same direction multiple times to densify the crease and improve stability. Finally, allow any glued or reinforced folds to dry completely before handling your paper gun to prevent unfolding or deformation.
These steps will keep your paper gun sturdy and durable. It’s pretty simple, but trust me, it makes all the difference!
Add Details to Make Your Paper Gun Look Realistic
Although your paper gun already takes shape, adding details will bring it to life and boost its realism. You can elevate your creation by focusing on subtle touches that mimic real firearm features.
Try using colored markers or paint to add metallic finishes and shading. This creates depth and simulates reflections on the surface. It’s a simple trick that really makes a difference.
Attach small paper or foam details like a trigger or barrel accents. These little additions enhance the three-dimensional look and make your gun feel more authentic. It’s all about those extra touches.
Don’t forget to incorporate tiny paper screws or rivets along seams and joints. Adding these small elements boosts the realistic appearance and texture. They give your paper gun that finishing touch that stands out.
Test Your Paper Gun and Fix Common Issues
How well does your paper gun shoot? Test it by firing multiple times to guarantee smooth, consistent action. If it jams or shoots weakly, reinforce the barrel or adjust the paper tension.
Test your paper gun by firing repeatedly to ensure smooth action; reinforce or adjust if it jams or shoots weakly.
Strengthen the firing mechanism with extra folds or tape if the shot doesn’t travel far. Check for loose parts or creases that could interfere with operation and reinforce them carefully.
During testing, regularly inspect your paper gun for worn or damaged sections and replace them as needed. These simple fixes will keep your paper gun performing at its best and help you enjoy shooting without interruptions.
Taking the time to test and troubleshoot assures your paper gun works reliably every time you play. So, don’t skip this step—it really makes a difference!
Customize Your Paper Gun With Different Styles
When you want your paper gun to reflect your personality, customizing it with different styles is the way to go. You can transform a simple paper gun into something unique by playing with colors, shapes, and accessories.
Here are three ways to customize your paper gun:
- Use markers, paints, or colored paper to give your gun vibrant or subtle hues that suit your style.
- Add decorative elements like stickers, decals, or tape to make it stand out with a personal flair.
- Alter parts like the barrel or handle through folding techniques or by adding faux accessories such as scopes or grips to create futuristic or classic designs.
With these options, your paper gun won’t just be a toy—it’ll be a creative expression. Give it a try and see how fun it can be!
Frequently Asked Questions
What Is the Simplest Gun Ever Made?
The simplest gun ever made is a blowgun. You just need a tube and darts to shoot.
It’s straightforward and effective, letting you launch projectiles easily without complicated parts or mechanisms.
Pretty neat, right? Just a basic tool that gets the job done without any fuss.
What Gun Can Fold?
Imagine a paper crane folding neatly into your palm—that’s how foldable paper guns work. You’ll find only designs with special crease patterns or hinge-like folds can collapse.
This makes them compact and easy to carry or stash away quickly. It’s pretty clever, right?
How to Make a Paper Gun Without Glue That Can Shoot?
You fold a rectangular paper tightly for the barrel, create a trigger flap, roll a paper cone as the bullet, and use a folded flap as a firing pin.
Keep folds sharp to shoot without glue effectively.
It’s all about making sure the folds are tight and neat so everything fits and works smoothly.
Once you get the hang of it, shooting your paper gun feels pretty satisfying!
What’s the Easiest Gun to Use?
The easiest gun to use is the classic paper slingshot or pop gun.
You’ll just need a sheet of paper and a rubber band, then fold it simply—no glue or complex steps—making it quick and fun to operate.
Conclusion
Now that you’ve crafted your paper gun, you’ll see how simple folds can create something fun and sturdy. Did you know the average person folds a piece of paper about seven times before it becomes too thick? That shows just how much detail and care your paper gun needs to hold its shape.
Keep practicing these steps, customize your design, and soon you’ll be making impressive, realistic paper guns that are both cool and durable! Remember, making paper guns is all about patience and creativity. The more you fold, adjust, and try new techniques, the better your paper guns will look and perform. So, keep at it and enjoy the process of crafting your own unique paper gun!