How to Use a Hot Glue Gun in 7 Easy Steps
Clear your workspace and plug in the hot glue gun, letting it warm up for 3–5 minutes. This step is important because a properly heated glue gun ensures smooth glue flow and strong bonds. While you wait, grab a compatible glue stick to insert next.
Once warmed, insert the glue stick and test the flow on some scrap material. This helps you get a feel for the glue’s consistency and prevents messes on your project. When you’re ready, apply glue carefully to one surface, keeping the gun about 1–2 cm away and using steady pressure.
Press the pieces firmly together and hold them for 10–30 seconds to let the glue set properly. It’s best to let the glue cool completely before trimming any excess. When you’re done, unplug the gun and store it upright in a safe spot to avoid accidents.
Follow these steps, and you’ll create strong bonds while staying safe. There’s plenty more useful tips ahead to help you master using a hot glue gun!
Key Takeaways
- Plug in the hot glue gun and allow it to warm up for 3–5 minutes before use.
- Insert a compatible glue stick fully into the rear feed tube and prime the nozzle by squeezing the trigger gently.
- Clean and prepare surfaces by removing dust and oils, and lightly roughen smooth materials for better adhesion.
- Apply glue in short 1–3 second bursts, keeping the nozzle 1–2 cm from the surface and moving steadily.
- Press glued parts firmly together for 10–30 seconds and allow the joint to fully cure without moving.
Prepare Your Glue Gun Workspace and Safety Gear

You should always prepare your workspace before using a hot glue gun to guarantee safety and efficiency. Start by clearing your surface and covering it with a silicone drip mat or scrap cardboard to protect against hot glue drips and keep your area stable.
Always prepare your workspace by clearing the surface and protecting it with a silicone mat or cardboard.
Work in a well-ventilated space, away from flammable materials. Keep a heatproof bowl or silicone pad nearby to set your glue gun down safely when not in use.
Wear heat-resistant gloves and closed-toe shoes, tie back long hair, and secure loose clothing to avoid accidental contact with the hot glue nozzle. Have a clean, damp cloth, cotton swabs, and isopropyl alcohol ready for cleaning cooled residue.
Position your glue gun on its built-in stand on a level surface, plug it in only after inserting the glue stick, and wait 3–5 minutes until the hot glue is ready to use.
Load the Glue Stick and Test Glue Flow
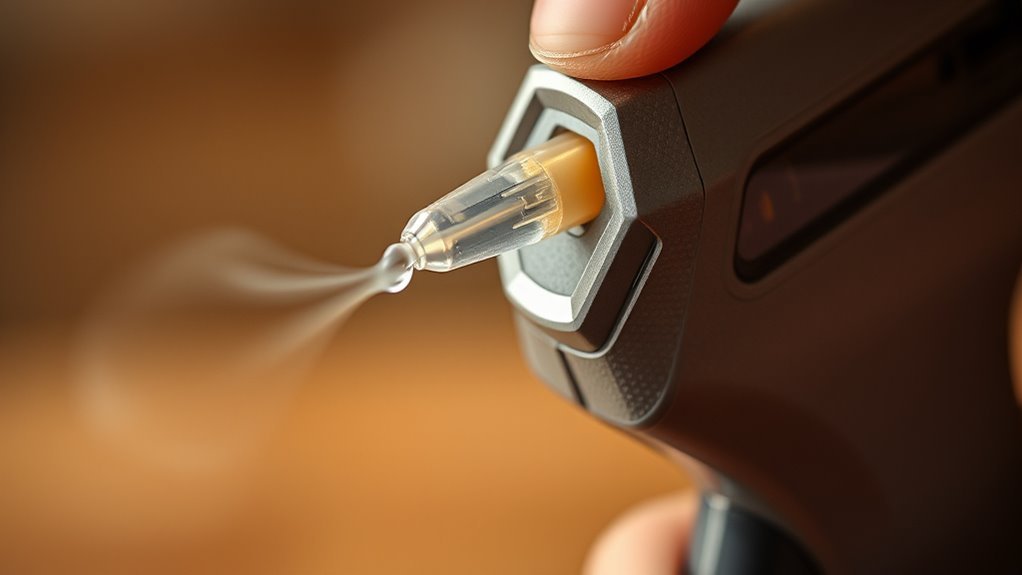
Once your workspace is set and safety measures are in place, it’s time to load the glue stick into your gun. Insert a compatible stick fully into the rear feed tube, then plug in the gun and wait 3–5 minutes for it to warm up.
Gently squeeze the trigger to extrude a small bead, priming the nozzle and clearing residue. Test the flow on scrap material—a smooth bead means proper heat.
If flow falters, wait longer or try a fresh stick.
| Step | Action | Tip |
|---|---|---|
| 1 | Insert glue stick fully | Use new sticks for best flow |
| 2 | Warm glue gun | 3-5 minutes (10 if spray) |
| 3 | Test flow on scrap surface | Look for smooth bead |
| 4 | Troubleshoot weak flow | Wait or replace stick |
| 5 | Clean nozzle after use | Prevent buildup |
This guarantees your glue gun, whether you’re a new account user or a seasoned pro, runs smoothly—tips generated by AI.
Apply Hot Glue Carefully to One Surface

Before you apply hot glue, make sure the surface is clean and dry for the best bond. Hold the glue gun steady and squeeze gently to lay down a thin, even bead on just one surface.
Use only enough glue to fill gaps and avoid excess that can spill out and create a mess. It’s better to keep things neat and controlled when you’re working with hot glue.
Surface Preparation Tips
When preparing surfaces for hot glue, start by thoroughly cleaning both areas with isopropyl alcohol and a lint-free cloth. This removes dust, oil, and residue that might prevent proper adhesion.
Next time you glue, lightly roughen smooth surfaces like glass or finished wood with fine sandpaper. This helps improve bonding.
For porous materials, test a small spot first using a thin bead and let it cool fully. Hold parts firmly during the glue’s open time for best results.
| Surface Type | Preparation Method | Notes |
|---|---|---|
| Smooth Plastic | Sand with 220–320 grit sandpaper | Increases mechanical grip |
| Glass | Sand lightly | Improves surface area |
| Porous Fabric | Test small spot, use thin bead | Avoids soaking |
| Unsealed Wood | Clean, test spot | Prevents weak bonds |
| Paper | Clean, test spot | Use minimal glue |
These tips for using hot glue help guarantee a strong, lasting bond. Give them a try and see how much better your projects hold together!
Controlled Glue Application
Preparing your surfaces properly sets the stage for applying hot glue with precision. Keep the glue gun tip 1–2 cm from the surface and squeeze the trigger with steady, light pressure to release a thin, controlled line.
Work in short bursts of 1–3 seconds, moving the gun steadily to lay down an even bead. For small spots, dispense glue onto a craft stick or silicone mat, wait 5–10 seconds for it to cool slightly, then transfer the tacky glue to your surface.
Use a narrow nozzle (3–5 mm) for finer control, wiping it with a heat-resistant cloth between uses to prevent drips. And finally, clamp or hold parts in place immediately after applying glue to guarantee a secure bond without shifting.
Avoiding Excess Glue
A careful approach to applying hot glue guarantees you avoid excess that can weaken your bond or create a mess. Hold the glue gun just 1–2 cm from the joint and apply short bursts of 1–3 seconds to place small beads instead of a continuous stream.
For precision, trim the glue stick tip flush and use a low-temperature setting or a fine-tip nozzle to control flow and bead size. Pre-fit and clamp parts so you only need one quick dab per tack point, minimizing squeeze-out.
Always work over a silicone drip mat or scrap cardboard and keep a paper towel handy for stray beads. If excess glue appears, let it cool briefly, then trim thin strings with a sharp knife or peel off while still warm to avoid smearing.
Press Glued Pieces Firmly Together and Hold
Press the glued pieces firmly together right after applying hot glue, and hold them steady for 10 to 30 seconds to let the bond set. Apply steady, even pressure without rocking or jiggling to guarantee full contact and avoid weak spots.
For porous materials like fabric, wood, or cardboard, hold for 30 to 60 seconds so the glue can penetrate fibers and cool properly, creating a stronger bond. If the pieces are heavy or awkward, use clamps, clothespins, or a weighted object to maintain consistent pressure while the glue cures.
Avoid touching the joint directly, especially if it’s hot. Wear heat-resistant gloves or press with a scrap piece of cardboard to protect your fingers and keep the bond intact.
Trim Excess Glue After Cooling
After applying glue, wait 5 to 10 minutes for it to cool and harden completely before trimming. Use a sharp hobby knife held at a low angle to carefully shave off any excess glue without damaging your project.
Take your time with clean cutting techniques. This way, you’ll guarantee a smooth, professional finish.
Cooling Time Importance
Though it’s tempting to trim hot glue immediately, you’ll get cleaner results if you wait 5 to 10 minutes for it to cool and harden. Thin beads cool faster, but thicker blobs need more time to avoid stretching or stringing when trimmed.
Waiting guarantees smoother edges and safer handling.
| Glue Thickness | Cooling Time | Tool Recommended | Common Issue if Cut Hot | Finishing Tip |
|---|---|---|---|---|
| Thin (< 2 mm) | 1–2 minutes | Sharp craft knife | Stretching, ragged edges | Lightly buff with sanding stick |
| Thick (> 2 mm) | 10–15 minutes | Scalpel | Burns, stringing | Trim after fully cooled |
| Cooling Tail | 5–10 minutes | Craft knife | Excess buildup | Use silicone drip mat |
Patience really pays off when you want crisp, clean glue edges.
Clean Cutting Techniques
Master clean cutting by waiting until the glue cools completely—usually 5 to 10 minutes—before trimming excess. Warm glue stretches and tears, so be patient.
Use a sharp hobby knife or flush-cut micro scissors held at a shallow angle to gently score and slice away surplus glue without damaging your project. For thicker beads, start with a perpendicular cut using a razor blade, then smooth edges with 220–320 grit sandpaper.
To remove stray strings, briefly heat a metal scraper or flame-hardened tweezer, crisp the string, and snap it off close to the surface. Always protect your fingers with cut-resistant gloves and cover your work surface.
Clean or replace blades regularly, as hardened glue dulls tools and makes cuts ragged. These steps guarantee neat, precise finishing every time.
Unplug and Store Your Glue Gun Safely
If you won’t use your hot glue gun for 40 minutes or more, unplug it to prevent the heating element from continuously melting adhesive. This can pose a fire risk, so it’s best to disconnect the power.
After unplugging, push out about half a glue stick to clear the nozzle. Then, let the gun cool completely before storing it.
Store the gun upright on its stand or a heat-resistant mat in a ventilated area. Make sure it’s away from flammables and out of reach of children.
| Step | Action | Reason |
|---|---|---|
| Unplug | Disconnect power | Prevent fire risk |
| Extrude Glue | Push out half glue stick | Clear nozzle |
| Cool Down | Let gun cool fully | Avoid burns |
| Store Properly | Upright, ventilated, safe spot | Protect gun and surroundings |
Avoid Burns and Ensure Strong Bonds With Safety Tips
Before you start applying glue, let your hot glue gun warm up fully—usually 3 to 5 minutes for standard models. This makes sure the adhesive flows smoothly and helps reduce the risk of slips that can cause burns.
Always wear heat-resistant gloves or finger protectors. And never touch freshly dispensed glue—it’s hot enough to cause second-degree burns in seconds.
Use the gun’s stand or bench mount; never lay it on its side. This way, you avoid accidental contact and glue pooling.
Work on a heat-resistant mat and keep a damp cloth nearby just in case you need to cool burns if they happen.
For strong bonds, apply glue to one surface first. Then press the parts together quickly within 10–30 seconds, and let the joint cure fully without moving it to guarantee lasting adhesion.
Frequently Asked Questions
Why Is My Hot Glue Gun Not Working?
Your hot glue gun might not work because it’s not warmed up yet, or the glue stick you’re using is the wrong size.
Sometimes, the nozzle could be clogged, which stops the glue from flowing properly.
It’s also possible that the power source is faulty, so make sure it’s plugged in correctly and the outlet works.
Another thing to consider is whether the glue chemistry is compatible with your gun. If it’s not, the glue might not melt or stick as expected.
How to Dry Hot Glue Fast?
You can dry hot glue fast by blowing room-temperature air with a fan. Pressing a clean tool coated with oil gently on the glue also helps.
Another trick is misting a tiny water spray on small beads. Or you can clamp parts firmly to speed up the cooling process. It’s pretty simple once you try these!
How Do You Work a Glue Gun?
You insert a glue stick, plug in the gun, and wait for it to heat.
Then, gently squeeze the trigger to apply glue. Press parts together quickly, and hold until the bond sets for a secure hold. Easy, right? Just take your time and you’ll get the hang of it!
How to Properly Hot Glue Something?
Since hot glue sets in 10–60 seconds, you’ll want to work quickly. Apply a small bead close to the surface, hold parts firmly for at least 30 seconds, and avoid moving them until the glue cools fully.
It might feel a bit rushed, but staying steady is key. Once the glue starts to cool, it really grabs hold, so give it time to set properly before handling.
Conclusion
Now that you know how to use a hot glue gun, you’re ready to tackle any project with confidence. Remember, practice makes perfect—so don’t rush the process.
Take your time to handle the glue carefully, and always prioritize safety. With patience and care, you’ll create strong, lasting bonds every time.
Keep your workspace tidy, and never underestimate the power of a steady hand. After all, a stitch in time saves nine!
Using a hot glue gun might seem tricky at first, but with these simple steps, you’ll master it quickly. Whether you’re crafting, fixing, or decorating, the hot glue gun is a handy tool for making quick, durable bonds. Just follow the safety tips, work patiently, and enjoy the process. Soon enough, using a hot glue gun will feel like second nature, turning your DIY projects into neat, professional-looking creations.