How to Work a Caulk Gun in 10 Easy Steps
Choose the right caulk for your job, then remove old caulk and clean the surface thoroughly. This step is crucial because proper preparation ensures the new caulk sticks well and lasts longer. Protect your work area with tape and drop cloths to keep things neat and avoid any mess.
Next, cut the caulk tube tip at a 45-degree angle to the right size, and puncture the seal. This helps you get a smooth and controlled flow of caulk. Load the tube into your caulk gun, squeeze steadily to apply a smooth bead, and tool it with a wet finger or tool for a clean finish.
Finally, clean up any excess caulk immediately and store or dispose of your tube properly. Master these basics, and you’ll perfect your caulking skills quickly.
With practice, using a caulk gun becomes easier and your home projects will look professionally done.
Key Takeaways
- Cut the caulk tube nozzle at a 45-degree angle to the desired bead width, typically 1/8 to 1/4 inch, for smooth application.
- Load the caulk tube heel-first into the gun, pull the plunger back 6–8 inches, then push it forward to seat firmly against the tube base.
- Puncture the inner foil seal through the nozzle using the built-in tool or a nail with gentle pressure before starting.
- Hold the gun at a 45-degree angle, squeeze the trigger steadily, and move the gun forward smoothly to apply an even bead.
- Test the flow on scrap material, adjust nozzle cut or plunger position as needed, and release the trigger slightly before ending the bead.
Choose the Right Caulk for Your Project

When you start a caulking project, picking the right type of caulk is essential for a lasting seal. You’ll want silicone for wet areas like bathrooms or exteriors because it resists moisture well.
For interior joints that need painting, acrylic latex is your go-to since it dries faster and can be painted over. Make sure to take into account the bond strength and flexibility depending on your needs—polyurethane or butyl rubber work best for exterior or high-movement joints.
Before applying, cut the nozzle to match the gap size, usually between 1/8 and 1/4 inch, ensuring a neat bead. Also, factor in cost and durability—higher-performance caulks may cost more but offer longer-lasting results.
Remove Old Caulk and Debris

Start by carefully slicing away the old caulk using a utility knife or a caulk removal tool, keeping the blade at a shallow angle to prevent damaging the surface beneath. Work along the seam to peel off the old bead, exposing the back of the caulk for easier removal.
Next, scrape away any leftover residue or hardened bits with a putty knife or plastic scraper until the joint is smooth and clean. Remove paint flakes or loose caulk with a stiff brush, then vacuum or wipe away dust.
This step makes certain your new caulk will adhere properly when you use a caulk gun. Taking the time to clear away old caulk and debris sets the foundation for a clean, professional finish with your caulk guns.
Clean and Protect the Work Area
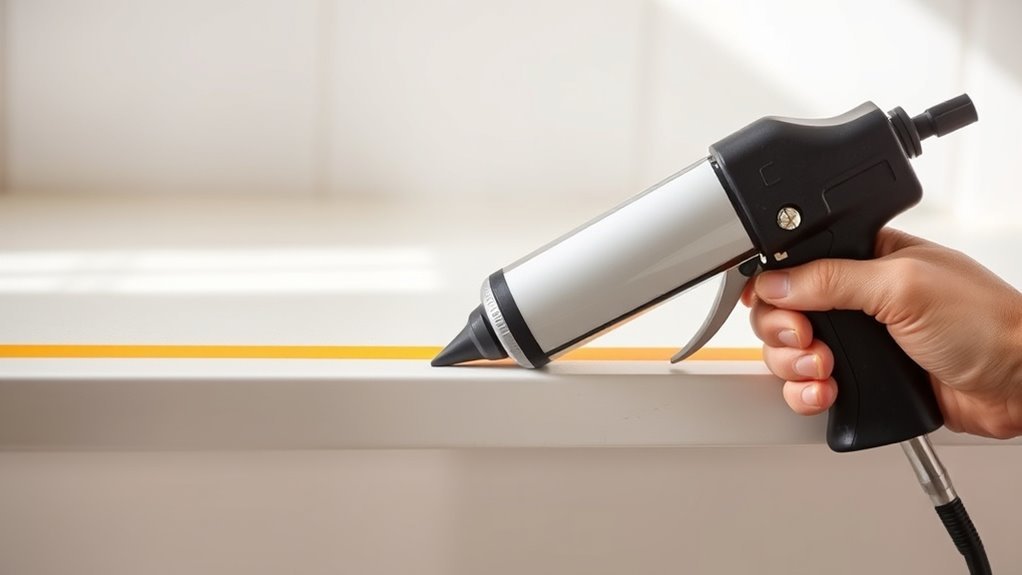
Before you apply new caulk, take the time to clean the surface thoroughly and shield the surrounding area. Removing old caulk and grease guarantees proper adhesion.
Protect adjacent surfaces to keep your work neat. Here are essential tips for using your caulk gun effectively:
- Remove debris with a putty knife, then wipe with rubbing alcohol or soapy water; let dry completely.
- Apply painter’s tape above and below the seam, exposing only the bead area.
- Lay down drop cloths or plastic sheeting to protect floors and fixtures from drips.
- Mask hardware or delicate surfaces with extra tape or cardboard to prevent smears.
Keep a damp cloth handy to wipe squeeze-outs promptly. Once this is done, you’re ready for the next step—cutting the caulk tube tip.
Cut the Caulk Tube Tip at a 45-Degree Angle
Cut the caulk tube tip at a 45-degree angle using a sharp utility knife to guarantee smooth, controlled bead placement. This angle lets you direct the thicker nozzle side toward the gap, producing a tapered bead that’s easier to tool and smooth.
For standard beads, cut the opening about 1/8 to 1/4 inch wide. If you want fine control, trim closer to 1/16 inch. Or, cut near the base for larger gaps.
Make a clean, steady cut—ragged edges cause irregular flow and uneven beads. And don’t forget to replace dull blades to keep things precise.
A lot of folks wonder how wide to cut or why the angle matters. This method helps make sure you get consistent results every time.
Puncture the Seal and Load Your Caulk Gun
Press the release lever and pull the plunger back to make room for the caulk tube. Insert the tube heel-first, then push the plunger forward until it’s snug against the base.
Next, use the built-in puncture tool or a nail to pierce the seal. This step is important to make sure the caulk flows smoothly when you squeeze the trigger.
Seal Puncture Techniques
Loading your caulk gun starts with properly positioning the cartridge and preparing the nozzle for a smooth flow. First, press the release lever and pull the plunger back fully before inserting the cartridge heel-first.
Next, trim the nozzle tip at a 45° angle to match the bead size you need. Push the plunger forward until it contacts the cartridge base to secure it.
Then, puncture the inner seal through the nozzle using the built-in tool or a sharp object with light force.
Keep these points in mind:
- Pull plunger back 6–8 inches before inserting the cartridge
- Cut nozzle opening between 1/8 and 1/4 inch for standard beads
- Apply 10–15 lb of force to seat the plunger properly
- Puncture foil seal gently with 1–2 lb force to avoid damage
Proper Gun Loading
Begin by pulling the plunger back about 6 to 8 inches to make room for the caulk tube, then insert the tube heel-first with the nozzle pointing forward. Press the release lever on the back of the gun if needed to free the plunger.
Make sure the tube base seats firmly against the plunger rod. Next, push the plunger rod forward until it firmly contacts the bottom of the tube—this snug fit prevents slipping.
Cut the nozzle at a 45-degree angle to your desired bead size, typically between 1/8 and 1/4 inch for general use. Use the built-in puncture tool or a utility knife to pierce the inner foil seal.
Finally, squeeze the trigger slowly until caulk flows smoothly. Keep an eye on the plunger to make sure it stays seated for controlled application.
Adjust the Caulk Gun Plunger and Test Flow
Press the release lever and pull the plunger rod back to make room for the cartridge. Then, push it forward until it firmly contacts the tube base.
Cut the nozzle to the right size and puncture the seal before slowly squeezing the trigger to start the flow. It’s best to test the caulk on scrap material first to make sure you get an even bead.
If needed, adjust the cut size or plunger pressure until it flows just right. This way, you’ll get a smooth and consistent application every time.
Plunger Adjustment Techniques
Adjusting the plunger correctly guarantees a smooth, consistent flow of caulk without wasting material. Start by pressing the release lever with 5–10 lb of force and pulling the plunger rod fully back (6–8 inches) to fit the cartridge.
After seating the tube heel-first, push the plunger forward until it firmly contacts the tube base with about 10–15 lb of pressure. Before cutting the nozzle, make sure the rod is fully seated.
Once cut and punctured, squeeze the trigger slowly at a 45° angle. If no caulk flows, just advance the plunger an extra 1–2 mm.
To avoid drips, back off the plunger slightly after releasing the trigger. Remember to:
- Pull plunger fully back before loading
- Push plunger firmly against tube base
- Advance plunger slightly if flow stalls
- Back off plunger slightly to reduce oozing
Testing Caulk Flow
Once you’ve secured the plunger against the tube base with the right pressure, it’s time to check that the caulk flows properly. Slowly squeeze the trigger until caulk just begins to flow, confirming the plunger advances and pierces the seal.
Before this, cut the nozzle at a 45° angle to match your desired bead size, typically 1/8 to 1/4 inch. Hold the gun at a 45° angle and apply steady, moderate trigger pressure to dispense a 2–3 inch test bead on scrap wood or cardboard.
If the bead sputters or stalls, pull back the plunger, reseat it, and squeeze slightly harder. If the bead is too large, trim the nozzle smaller or ease trigger pressure.
Finally, wipe excess caulk and release plunger pressure to prevent oozing. Easy, right? Just a few steps to get it flowing just right!
Apply Caulk Steadily Along the Gap With Controlled Pressure
Hold the caulk gun at a 45-degree angle and squeeze the trigger with steady, moderate pressure to lay down a consistent bead. Cut the nozzle to about 1/8–1/4 inch for a standard bead size.
Move the gun forward smoothly, matching the caulk flow to avoid gaps or blobs. Remember to release the trigger slightly before the joint ends and pull the tip away gently to prevent excess caulk oozing out.
Keep these tips in mind: apply continuous, even trigger pressure—no bursts. Maintain a uniform speed along the gap.
Practice on scrap material to find the right pace. And don’t forget to pull the tip away smoothly at the end.
Controlling pressure and motion guarantees a neat, even caulk bead every time.
Smooth and Tool the Caulk Bead for a Clean Finish
While the caulk is still fresh, run a wet finger or silicone tool along the bead at a steady 45-degree angle to smooth it and press it firmly into the joint for better adhesion. Dip your finger or tool in water—or soapy water for silicone caulk—to prevent sticking and create a consistent, glossy finish.
Keep the bead about 1/8 to 1/4 inch wide for typical gaps. Use even, gentle pressure; too much force thins the bead and causes gaps, while too little leaves ridges that trap dirt and water.
Wipe excess caulk off your tool or finger on a damp rag between passes to avoid dragging dried residue back into the joint, which can create uneven texture. This careful tooling guarantees a clean, professional look.
Clean Excess Caulk and Remove Protective Tape
After smoothing the caulk bead to a clean finish, the next step is to carefully remove any excess caulk and peel away the protective tape. If you use painter’s tape, peel it off slowly at a 45-degree angle immediately after tooling while the caulk is still slightly wet to get a crisp edge.
For excess caulk, use a plastic putty knife or a damp finger to smooth it out, wiping away residue before it fully cures. If the caulk has dried, soften silicone with a utility knife or remover, and clean latex with rubbing alcohol or a scraper.
Remember to wait the recommended cure time before removing tape to avoid pulling fresh caulk. Peel tape slowly at 45 degrees for a clean line.
Also, smooth excess caulk before it dries. And be sure to use the proper tools and cleaners for dried caulk.
Store or Dispose of Your Caulk Tube Properly
Storing or disposing of your caulk tube correctly helps preserve its usability and guarantees safety. For short-term storage, wipe the nozzle clean and replace the cap. You can also use a screw-on cap or a duct-tape plug.
Properly storing your caulk tube by cleaning the nozzle and capping it extends its usability and ensures safety.
Keep the tube upright with the nozzle facing up to prevent curing inside. To extend the life of latex or acrylic caulk, squeeze out the air and seal the nozzle with plastic wrap and a tight cap. Then, store it in a cool, dry place away from sunlight.
Silicone caulk needs the manufacturer’s cap or a dowel in the tip, wrapped tightly with plastic and tape. Wait 24 hours to make sure the seal holds.
When it’s time to get rid of empty tubes, toss them in the regular trash. But if you have solvent-based or polyurethane tubes, take them to hazardous waste facilities instead.
Label partially used tubes with dates and always check your local guidelines. That way, you’ll stay safe and make the most of your caulk!
Frequently Asked Questions
How to Work a Caulk Gun?
You insert the tube, cut and puncture the nozzle, then hold the gun at 45°.
Squeeze the trigger steadily to apply caulk evenly. Release to stop, smooth the bead, and clean the nozzle to prevent drips.
It’s pretty straightforward once you get the hang of it! Just take your time and work carefully.
Why Can’t I Squeeze My Caulk Gun?
It feels like your caulk gun’s stuck in quicksand because the plunger’s jammed or the cartridge’s clogged.
Make sure you fully press the release, puncture the seal, and squeeze steadily at a 45° angle.
If it still won’t budge, try checking for any dried caulk blocking the nozzle. Sometimes a little cleaning can make all the difference!
Does a Caulking Tool Work?
Yes, a caulking tool works by giving you better control and steady flow when applying caulk. It makes the job easier, reduces hand fatigue, and helps you apply a smooth, even bead quickly and cleanly every time.
Honestly, once you start using one, it’s hard to go back to doing it by hand. It just makes everything feel more professional and less messy.
Do I Need a Caulking Gun to Use Silicone?
Do you really want uneven, messy silicone application? You don’t strictly need a caulking gun for small jobs, but for smooth, controlled beads on larger areas, a gun makes the job way easier and results professional-looking.
Honestly, it’s all about control. A caulking gun helps you apply silicone evenly without the hassle. So, if you want a neat finish, it’s definitely worth using one.
Conclusion
Now that you’ve mastered the caulk gun, you’re basically a home improvement superhero! With these simple steps, you can conquer any crack or gap like a pro—no more wobbly beads or messy disasters.
Your walls will thank you, your neighbors will envy your skills, and you might just find yourself craving more caulking projects. So grab that gun, get sealing, and watch your space transform faster than you ever imagined!
Using a caulk gun is easier than it looks once you get the hang of it. Whether you’re filling gaps in your bathroom or sealing windows, these steps will help you achieve clean, professional results every time. Keep practicing, and soon caulking will be your go-to DIY fix for all those pesky cracks and crevices around your home.